 Before we get into this recipe you have to see one of my favorite cooking show clips of all time. It's from Iron Chef America with Todd English versus Mario Batali and their secret ingredient is pizza dough. Click here to see the shows introduction. The only part I really like is from the 3:05 - 3:24 marks. The way he says "pizza dough" is just hilarious to me! I can't hear those words without thinking of this clip.
Anyway, I'm a big pizza fan and recently discovered a recipe from Tyler Florence that is delicious. I made a few tweaks to the dough and sauce for my taste and have been using the dough to make bread sticks similar to Little Caesar's Crazy Bread as well. This recipe makes two crusts so it's perfect to use one for the pizza and one for bread sticks*. It's very simple to make in a food processor or a stand mixer, but can be made my hand with a little elbow grease.
Let's start with the dough. I know many people have never made bread from scratch because we have been taught to fear yeast. Please don't be afraid. The best store bought bread still isn't as good as a mediocre homemade loaf and it's very easy to make if you have a right tools - which you do if you've been following this blog. Ideally, you would have a mother or grandmother (your own or someone else's) walk you through the entire process, but hopefully my pictures and instructions will help.

Every yeast bread recipe starts with "blooming the yeast." This just means you wake it up from it's dormant state in the packet by giving it a soak in a hot tub and a sweet snack. Start with 2 cups water (if you don't have good tap water, use bottled or filtered water, it can make a big difference in your bread) heated to 110-115 degrees (about 1 1/2 minutes in the microwave for me). Test it with a thermometer until you learn the temp by touch. Too cool and the yeast will be groggy, too hot and it will die. Add two packets (14 g) of yeast (I used pizza crust yeast for this, but it doesn't matter, it's all pretty much the same stuff). Next, add 2 tablespoons sugar (sweet snack). I like my dough to have a hint of sweetness like a really good soft pretzel....soft pretzels....mmmmmmm. Give it all a good whisking to make it start to bubble and foam up like the picture above. Set it aside and let it hang out while we prep the dry ingredients.

Weight 720 grams (6 cups) of flour directly into your food processor bowl (I have a 12 cup bowl, if yours is smaller, I suggest halving the recipe).

Add a heaping tablespoon of salt, 1/4 teaspoon each of oregano and garlic powder. Pulse a few times to mix everything together.

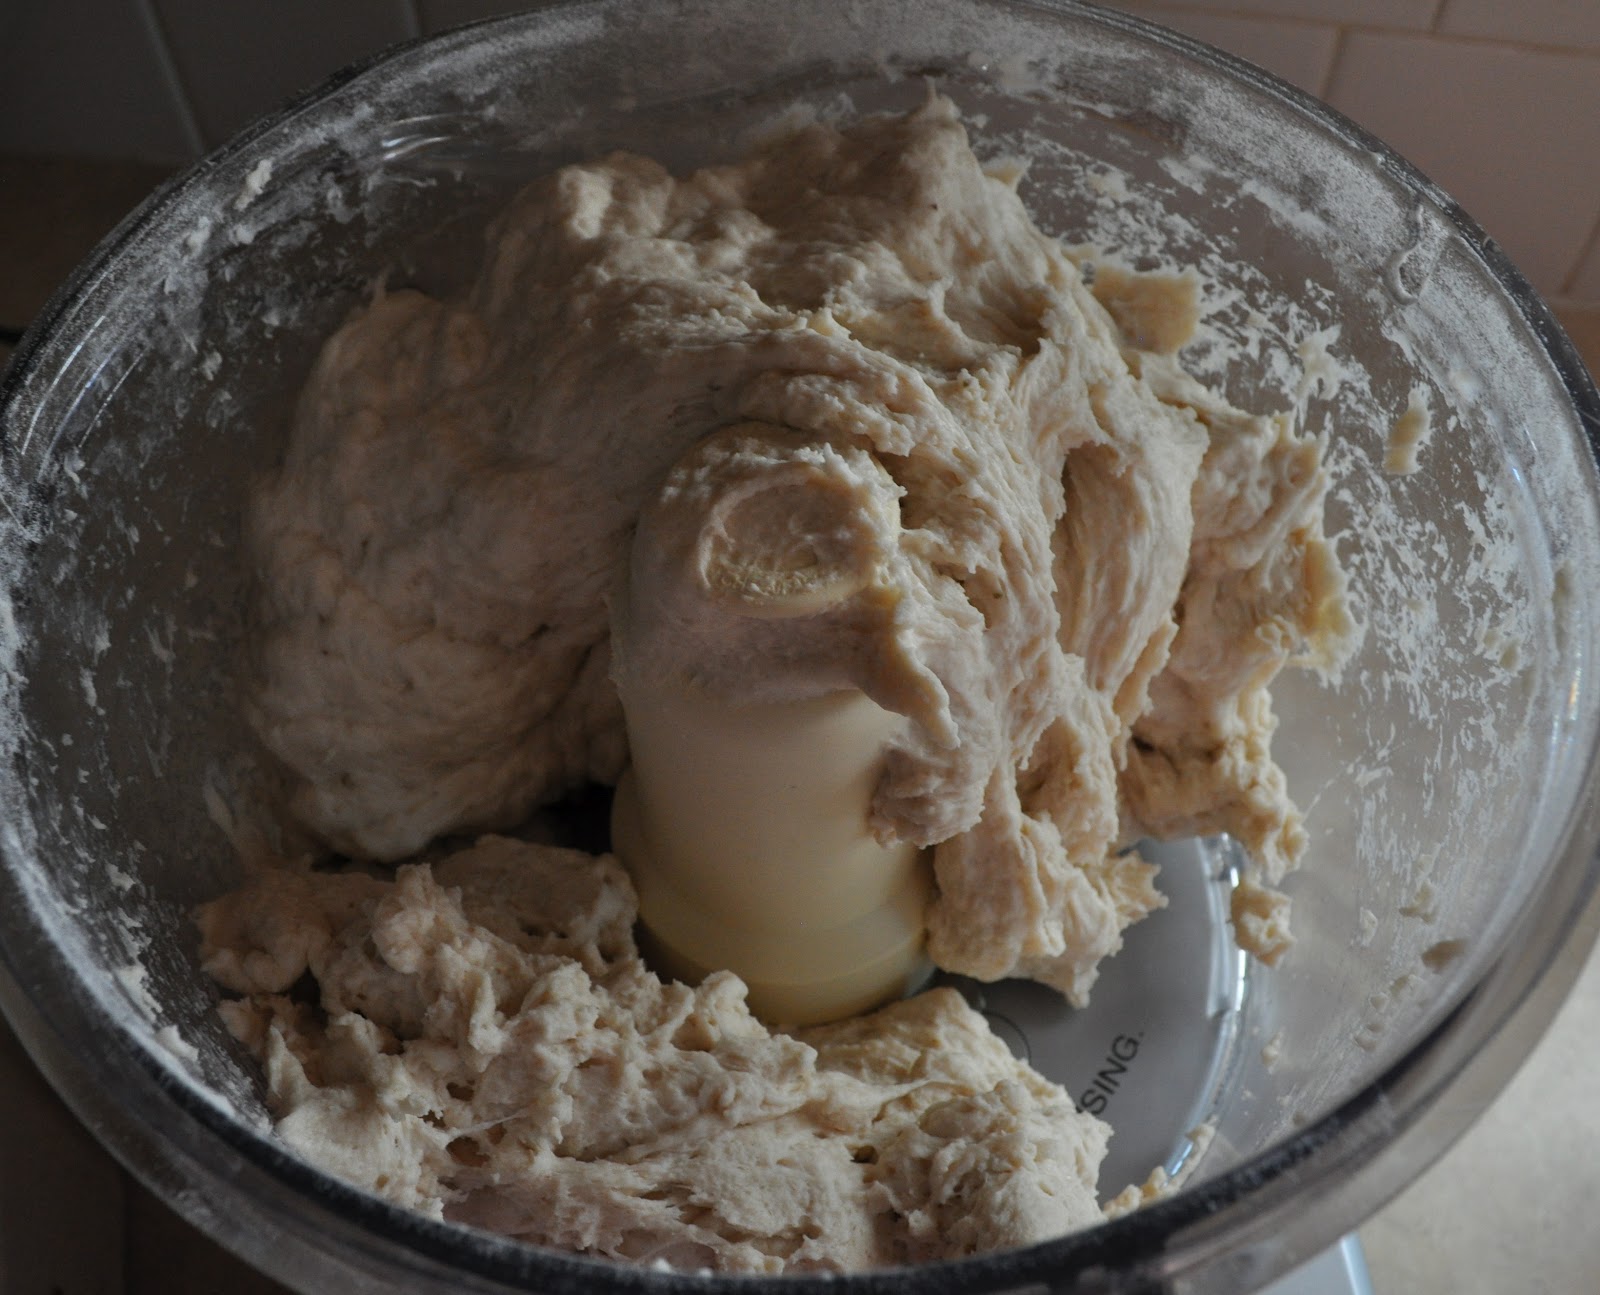
Whisk 2 tablespoons olive oil into your yeast mixture. Turn on food processor and slowly pour liquid into the feed tube. Process until dough starts to form. Stop when you see a big lump of dough form.

Remove the lid and check dough by touching it. It should be sticky, but not stick to your finger. There should be large portions on the bottom of the bowl that look clean. This dough is too wet, so I added more flour.

I added a spatula full of flour and pulsed it a few more times.
It's getting better, but it was still clinging to my finger when I touched it, so I added one more spatula of flour and pulsed a couple more times.

This looks good. The bowl is mostly clean and while the dough is still sticky, it doesn't cling to my finger.

Prepare a rising place for the dough by spraying non-stick spray into a gallon sized Ziplock bag.

Spray counter with non-stick spray (I like this better than flour for pizza dough because it's cleaner and keeps me from adding unnecessary flour to the dough) and kneed the dough a few times. I just push it down with my knuckles (see the marks?) fold it in half, turn it a quarter turn and repeat this process a couple more times.

Shape the dough into a ball and spray it with a little more non-stick spray.

Put it in the plastic bag, seal it and let it sit for about an hour.

This is how it looks after 1 hour. I thought the bag was going to explode.

Remove dough from bag and punch it down on a counter sprayed with non-stick spray.

Divide the dough in half.

I eyeballed it, then put them on the scale and kept adding to one and taking away from the other until they were equal (or close to equal) in weight.
Note: At this point, I put one ball back in my greased plastic bag and put it in the freezer to use another time. I wasn't quite ready to make my pizza at this point, so I put the other ball in a covered, greased bowl and set it in the fridge for an hour. This caused it to go through a second rise producing a lighter, fluffier crust similar to a pan pizza at Pizza Hut. For a more traditional, thinner crust, prepare pizza immediately once you get to this point.
Now for the sauce. This is a very simple sauce that could even be served on pasta or as the base for a tomato soup (I like to add a large can of condensed tomato soup and a cup of milk to the leftover sauce and make soup the next day).

In a medium saucepan, combine a 28 oz can of the best crushed tomatoes you can find (I picked these because they were the most expensive ones at Walmart, so I figured they were good....they are good). Add 1 tablespoon brown sugar, a few grinds of black pepper and 1/2 teaspoon each of: garlic powder, onion powder, dried oregano, dried basil and salt. Cook over medium heat until it starts to splatter and make a mess. Then cover and reduce heat to low.
Move your oven rack to the second lowest position and preheat the oven to 450.

Fresh mozzarella really makes this pizza. The regular mozzarella just won't have the same richness. I found this at Walmart in the deli section with the "fancy" cheeses, but it was about the same price as the other stuff.

Remove the cheese from the package and wrap it with a paper towel to remove any excess moisture.

Using a serrated knife, cut the ball in half and place them flat side down on your cutting board.

Slice each half into the thinnest slices you can make.

Finished slices

Prepare a pizza pan (this is a 12", but you could go up to a 16" with this recipe) by spraying it with non-stick spray and sprinkle it with cornmeal. Similar to how you would grease and flour a cake pan.

Flatten dough into a disk on the counter. I then tossed mine in the air about 5 times like the pizzeria guys do. This helps create a more uniform circle and creates a naturally thicker crust on the edge. Watch this video to see how the pros do it. The higher and faster you throw it, the more it will stretch the dough. Just toss it until it's the size of your pan.

Place the dough on the pan making sure is just overlaps the edges.

To create a professional rope edge (Susan used to work at Papa Murphy's and taught me this technique), place your pointer finger near the edge of the dough with your dominate hand. I'm left handed, so I will explain what I do. Just reverse it if you're right handed.

Using your thumb and pointer finger on your right hand, pinch a small piece of dough to the right of your left pointer finger. Stretch it out toward you a little then fold it up and over your left pointer finger pressing it into place.

Move your left pointer finger once space to the right and repeat this process until you have gone all the way around the crust.

Dock the dough by pricking it with a fork several times. This avoid bubbles during cooking that I call "pizza zits."

Top with sauce. I used a little less than a cup.

Arrange cheese slices over the top.

Fresh basil is really important in this recipe. They have fresh herbs in the produce section, but they are expensive and usually not very fresh, so I just headed over to the lawn and garden section and picked up a cheap basil plant. I trimmed off the mature leaves for my pizza and I have 3 plants that I can transplant in my garden.

Tear off leaves and place on top of cheese.

Drizzle with olive oil and a couple grinds of black pepper.

Bake at 450 for about 10 minutes and check. My pizza got a little watery in the middle, so I used a couple paper towels to blot it up then put it back in for another 3 minutes. The edges should be light brown and the cheese starting to bubble.

Let sit for 5 minutes then cut into wedges. A pretty inexpensive, easy vegetarian dish that the whole family will love. You're welcome ;)
*For bread sticks: Prepare the same way until until you get to the rope edge on the crust. Skip this step and cut them into strips with a pizza cutter. Brush on melted butter, sprinkle with garlic powder and sprinkle cheese (that is the Parmesan cheese that comes in the can). Bake at 450 for 10 minutes or until just beginning to brown. Top with more butter and cheese, if desired. You could also do cinnamon sugar instead of the cheese for a dessert stick. I better stop there with the ideas!
One of the cool things you can do with the braided pizza crust deal is you could sprinkle cheese and or pepperoni and make it a stuffed crust. It's awesome!
ReplyDelete